How to assign a "vanity" network number
These instructions are only needed when precise control of the exact NN is required. Most installs should just use the standard network number assignment form
Network numbers uniquely identify devices on the NYC Mesh network. They are used to compute IP addresses and in device names to locate and organize things. In some cases, mesh volunteers prefer a specific NN be allocated to a given install number, to allocate sequential numbers for a series of nodes, to match the street address, or some other significant number for the building.
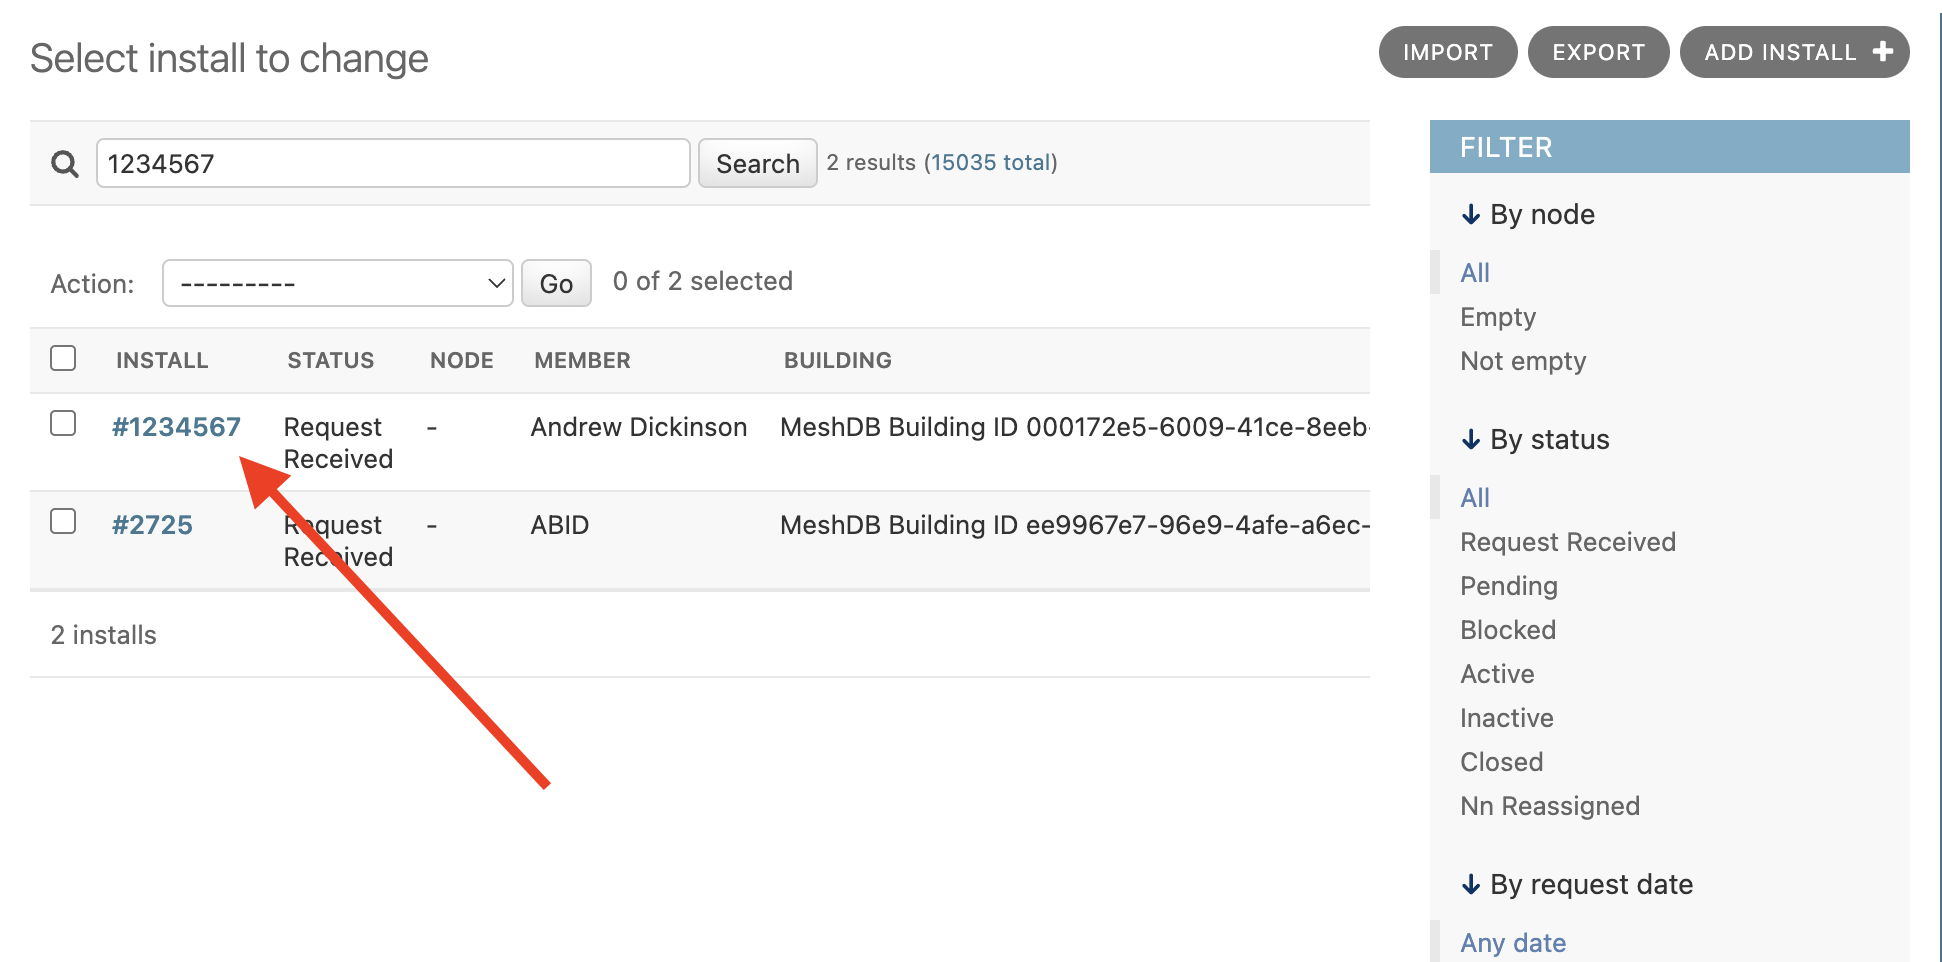
To allocate a specific network number for a given install, first validate that the desired network number is unused. Navigate to the Install search page and enter the network number you'd like to use:
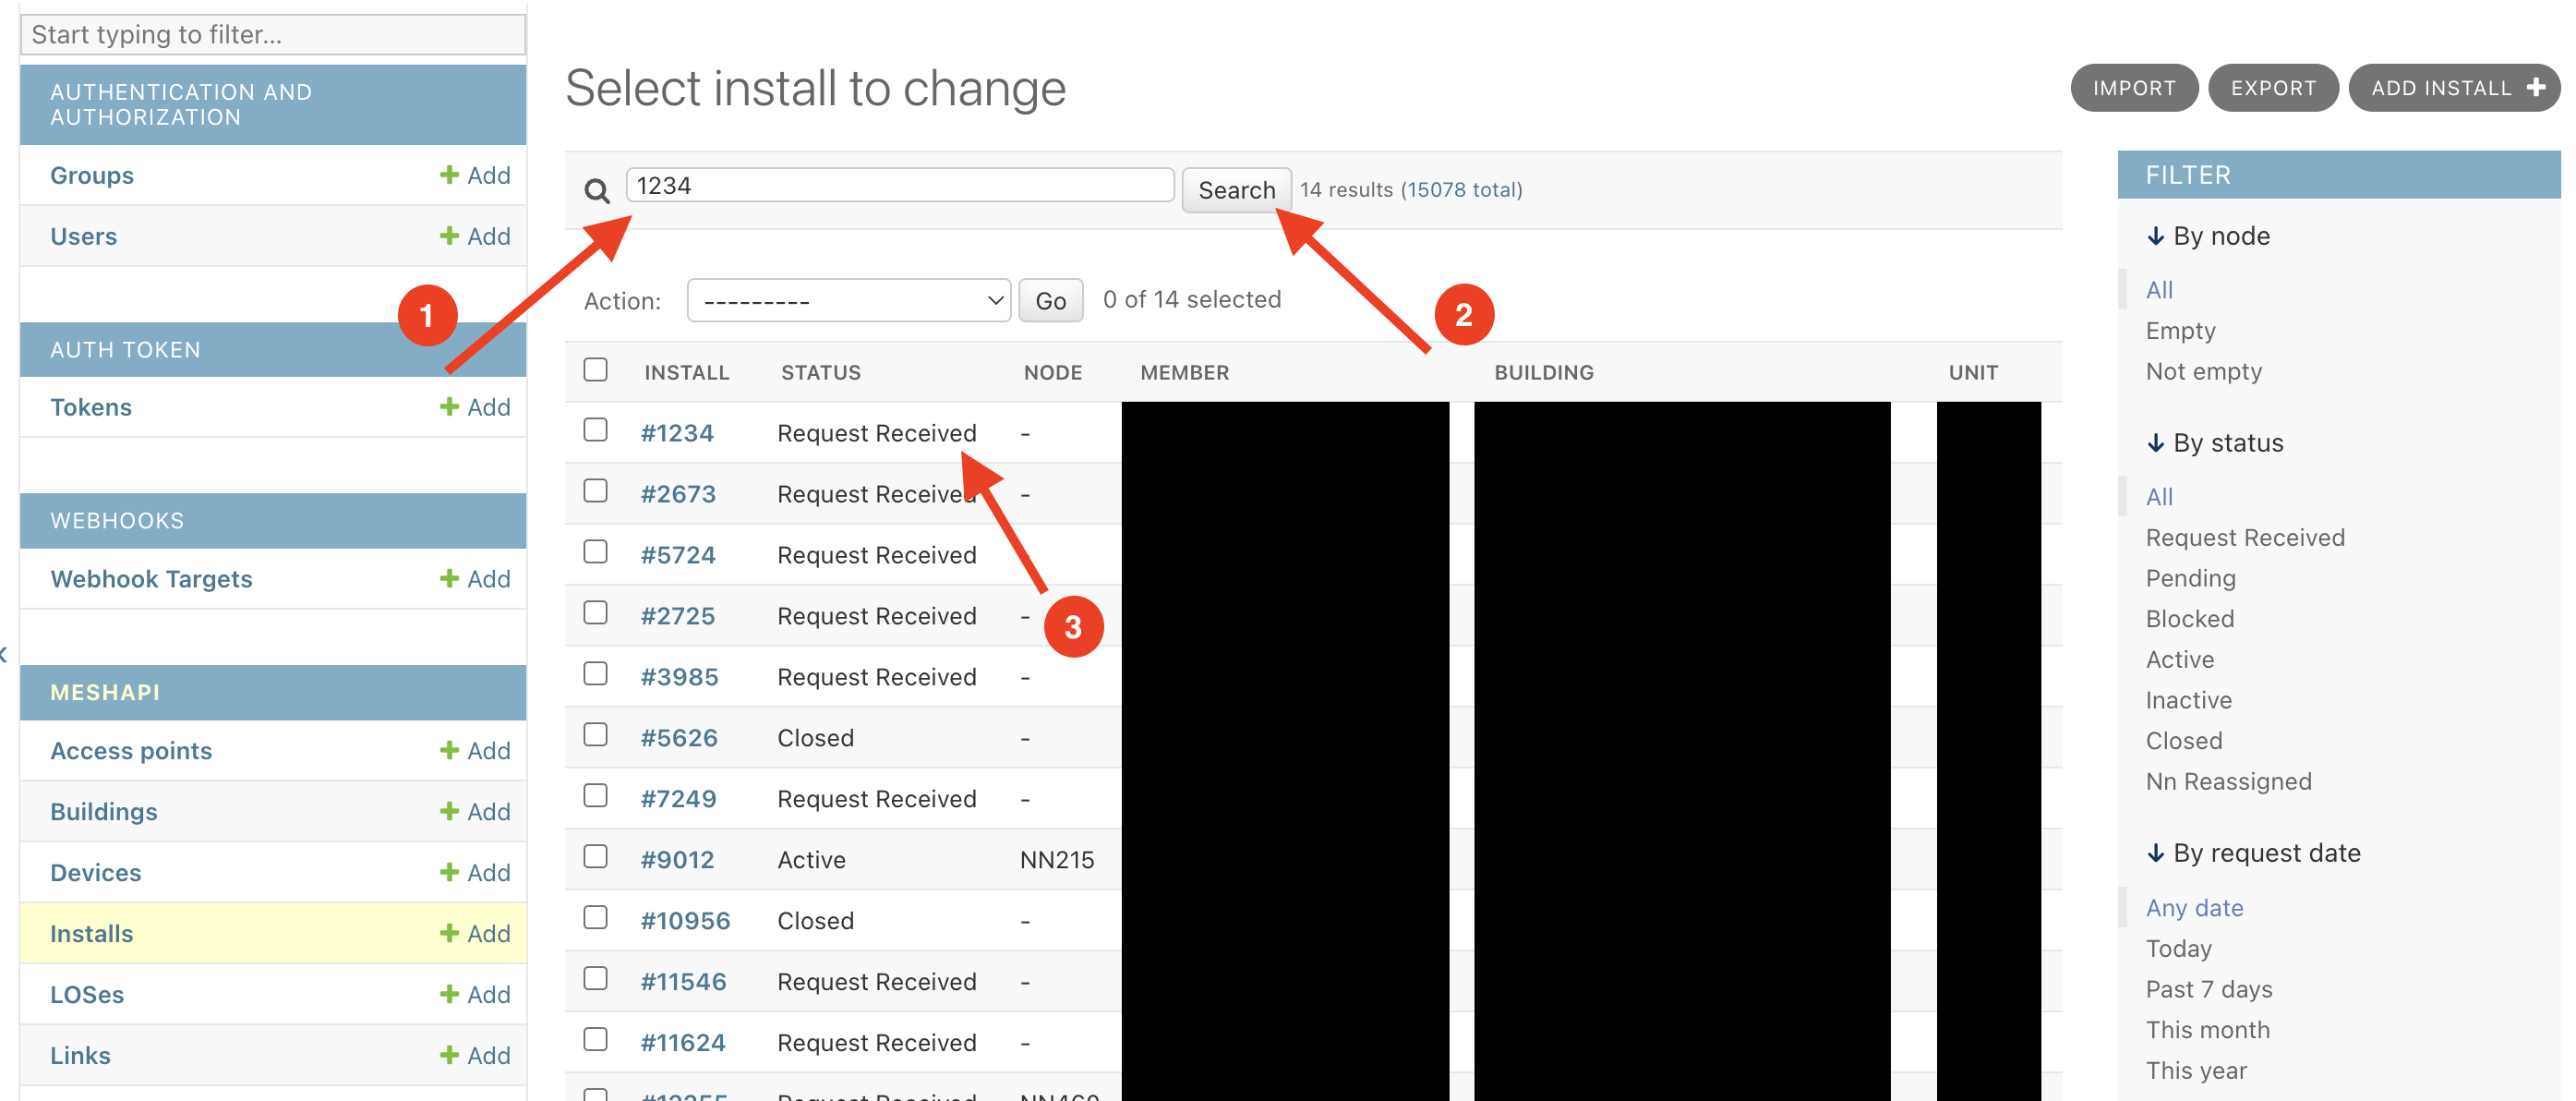
Click "Search" and then find the row where the install number corresponds to the desired network number. Check the status of this row. To recycle the install # as a vanity NN, the status must not be Active. In this case, the Install shows as Request Received, so we are good to proceed.
Next, check for any pre-existing nodes with the desired network number. Open the Node search page and enter the desired network number:
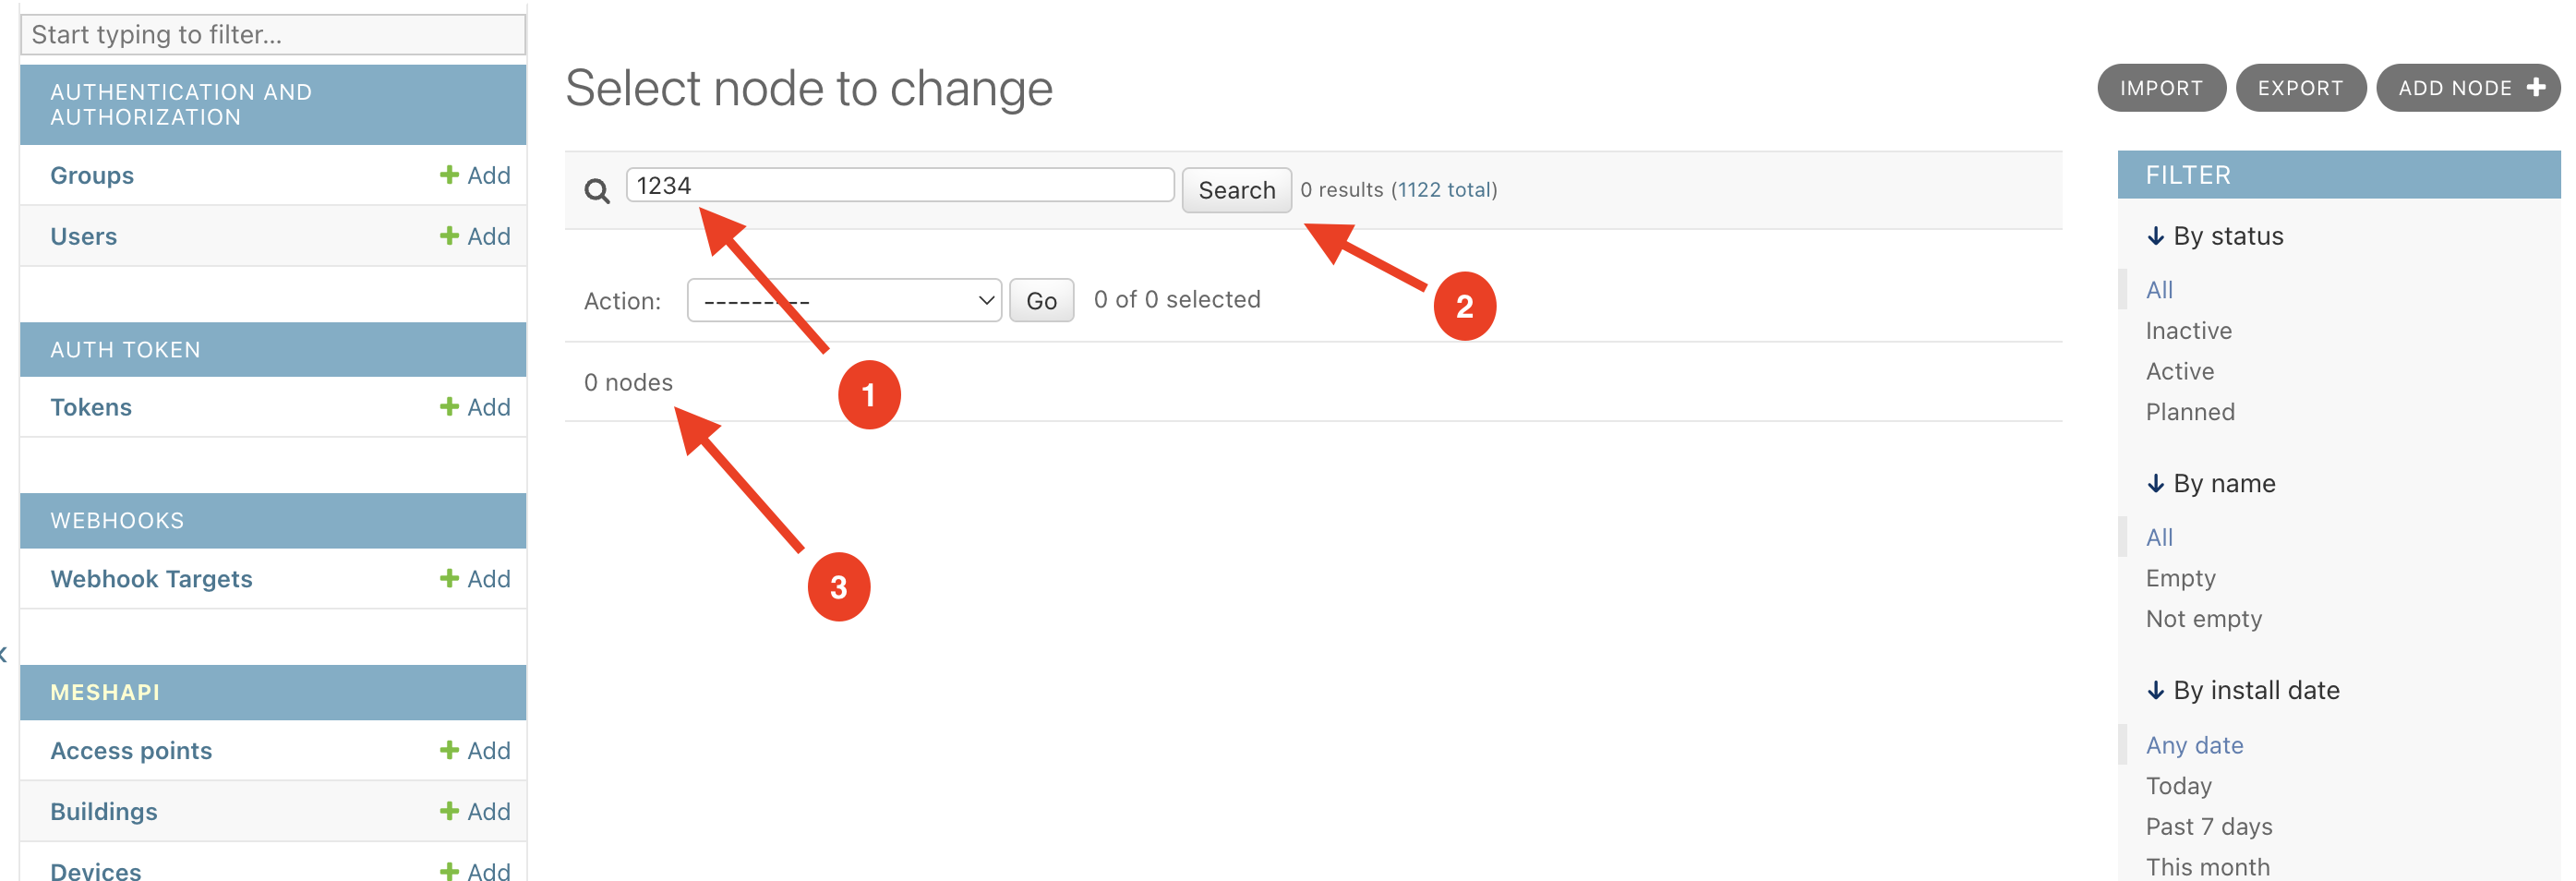
Click "Search" and then confirm that there are no nodes matching this network number
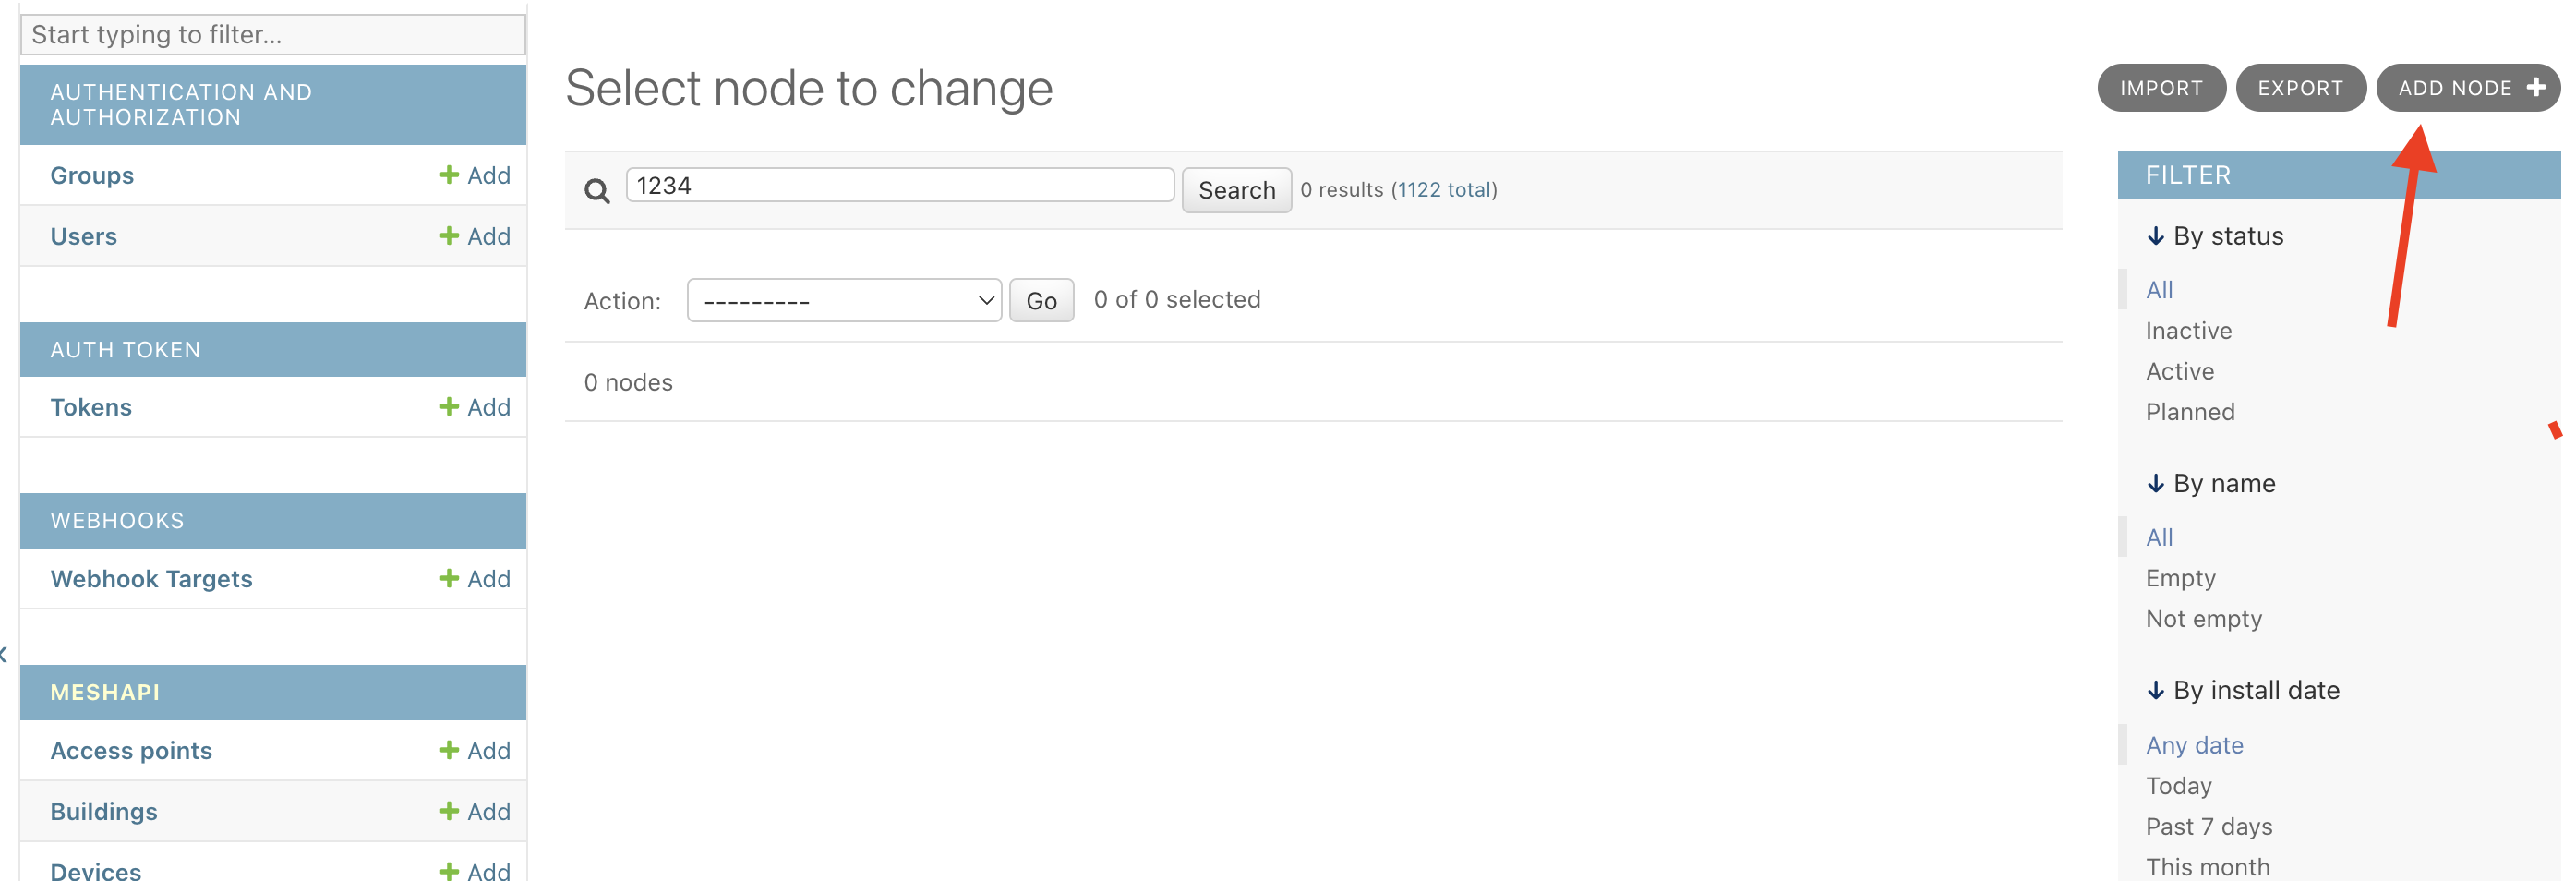
The two above checks are considered best practice to locate a valid network number. However, they are not strictly necessary. MeshDB will perform these checks on your behalf to ensure NN allocation safety as needed in the next step.
Finally, select Add Node to enter the node creation form
Enter the desired NN in the Node Creation form:
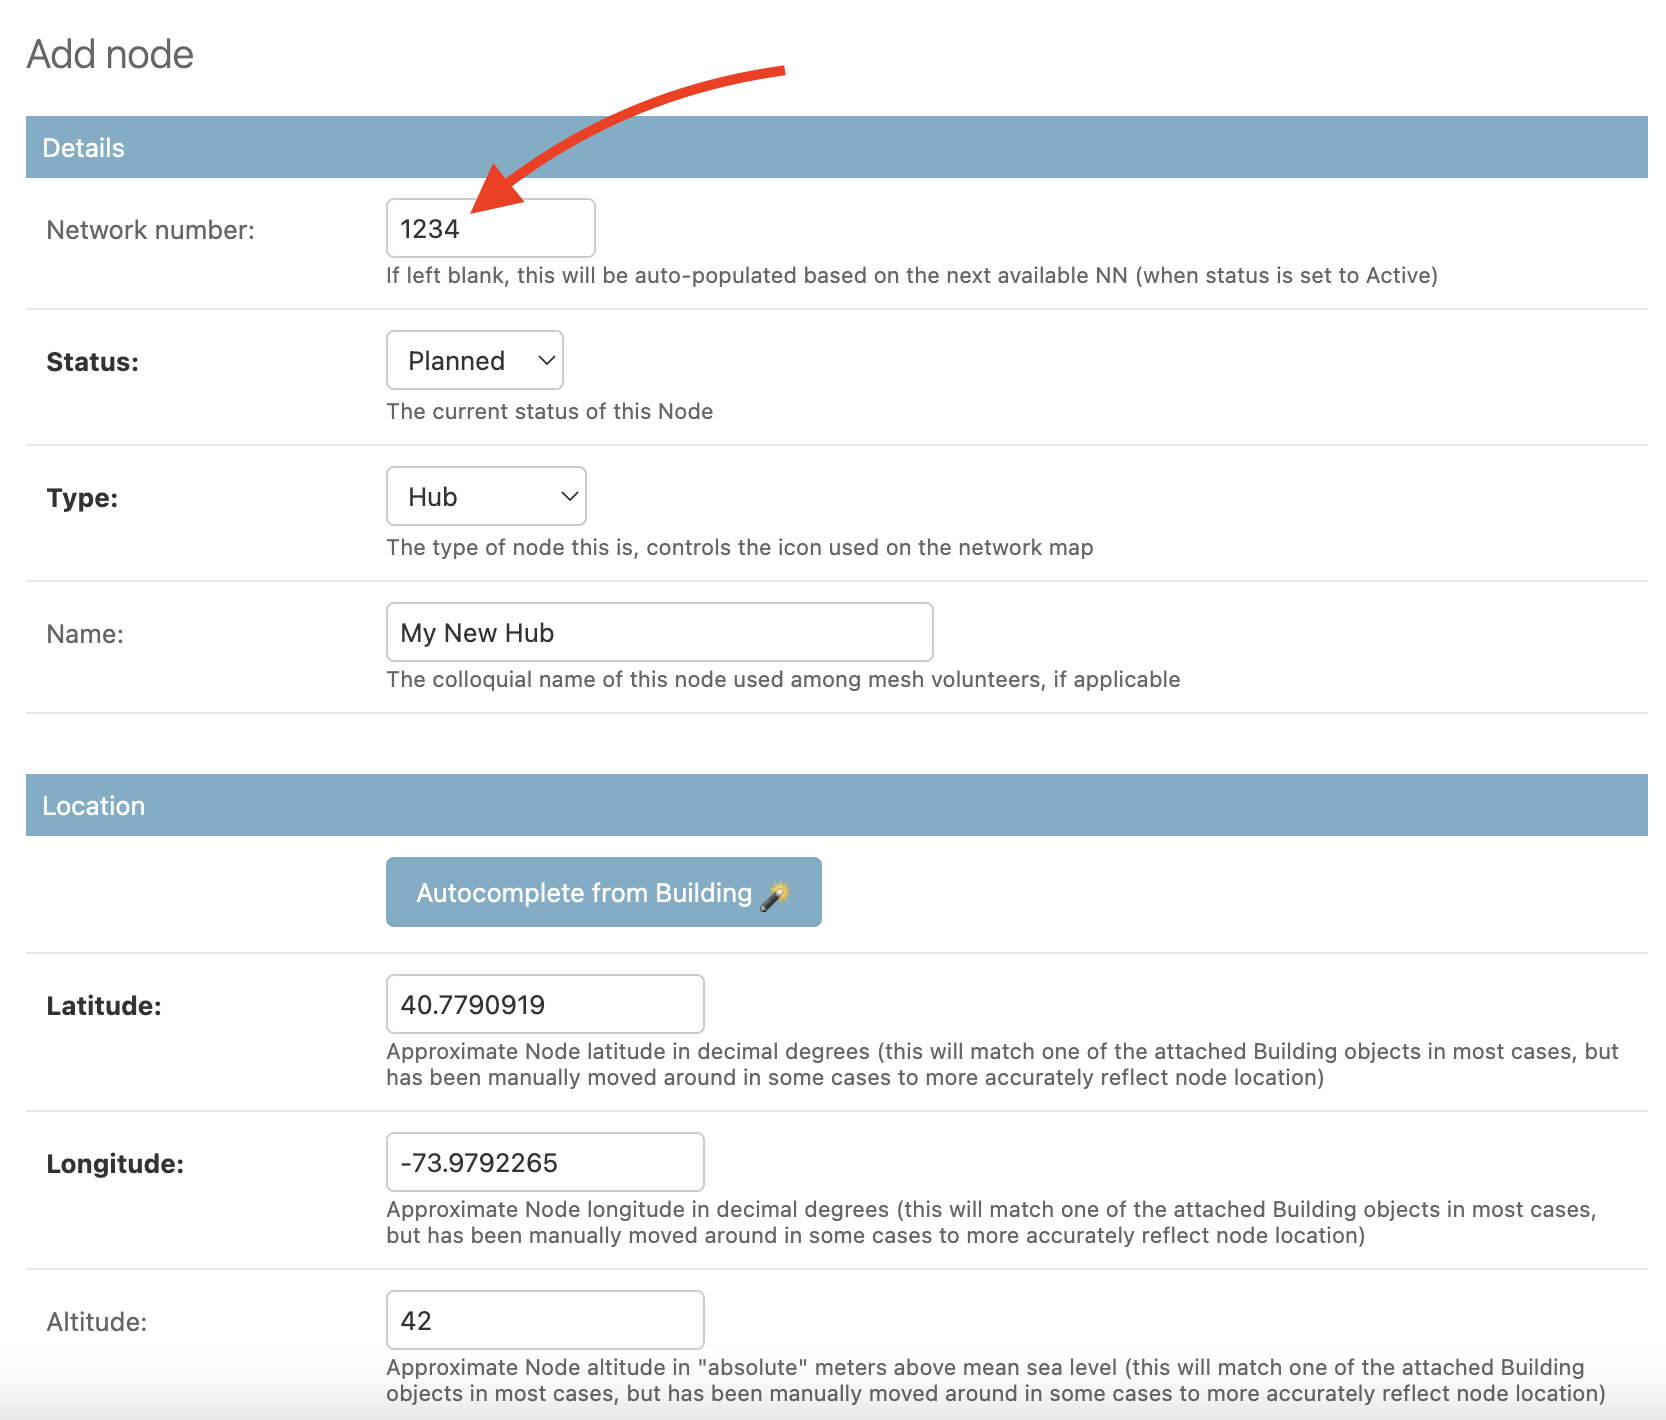
Fill out the remainder of the node creation form based on the details of your node. In this case, we are assigning a network number to a Planned Hub, so we select Planned for the status and Hub for the type.
Pro tip: to avoid having to manually enter the latitude, longitude and altitude information, you can automatically populate this information from the Building object. See How to avoid manually entering latitude/longitude/altitude when constructing Node objects for more information
We complete the rest of the fields as appropriate, and click "Save" at the bottom of the form:
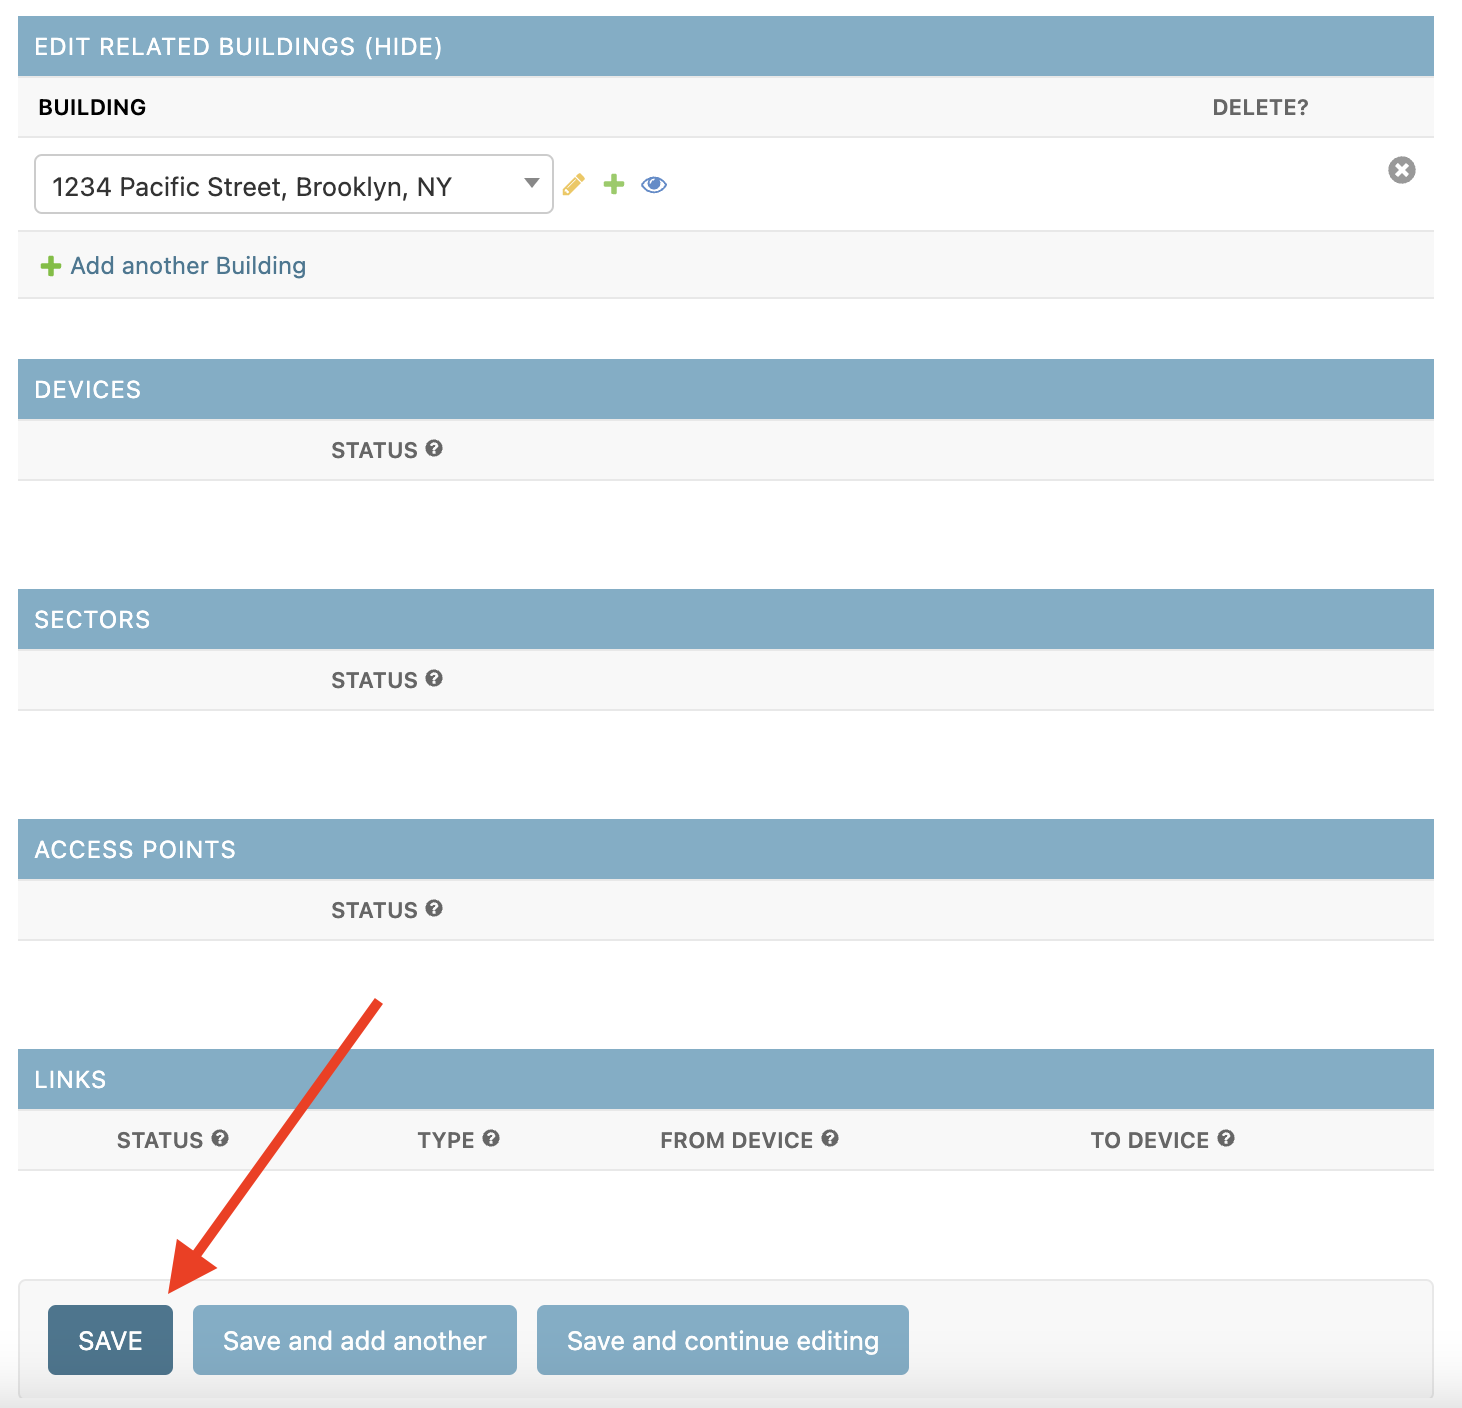
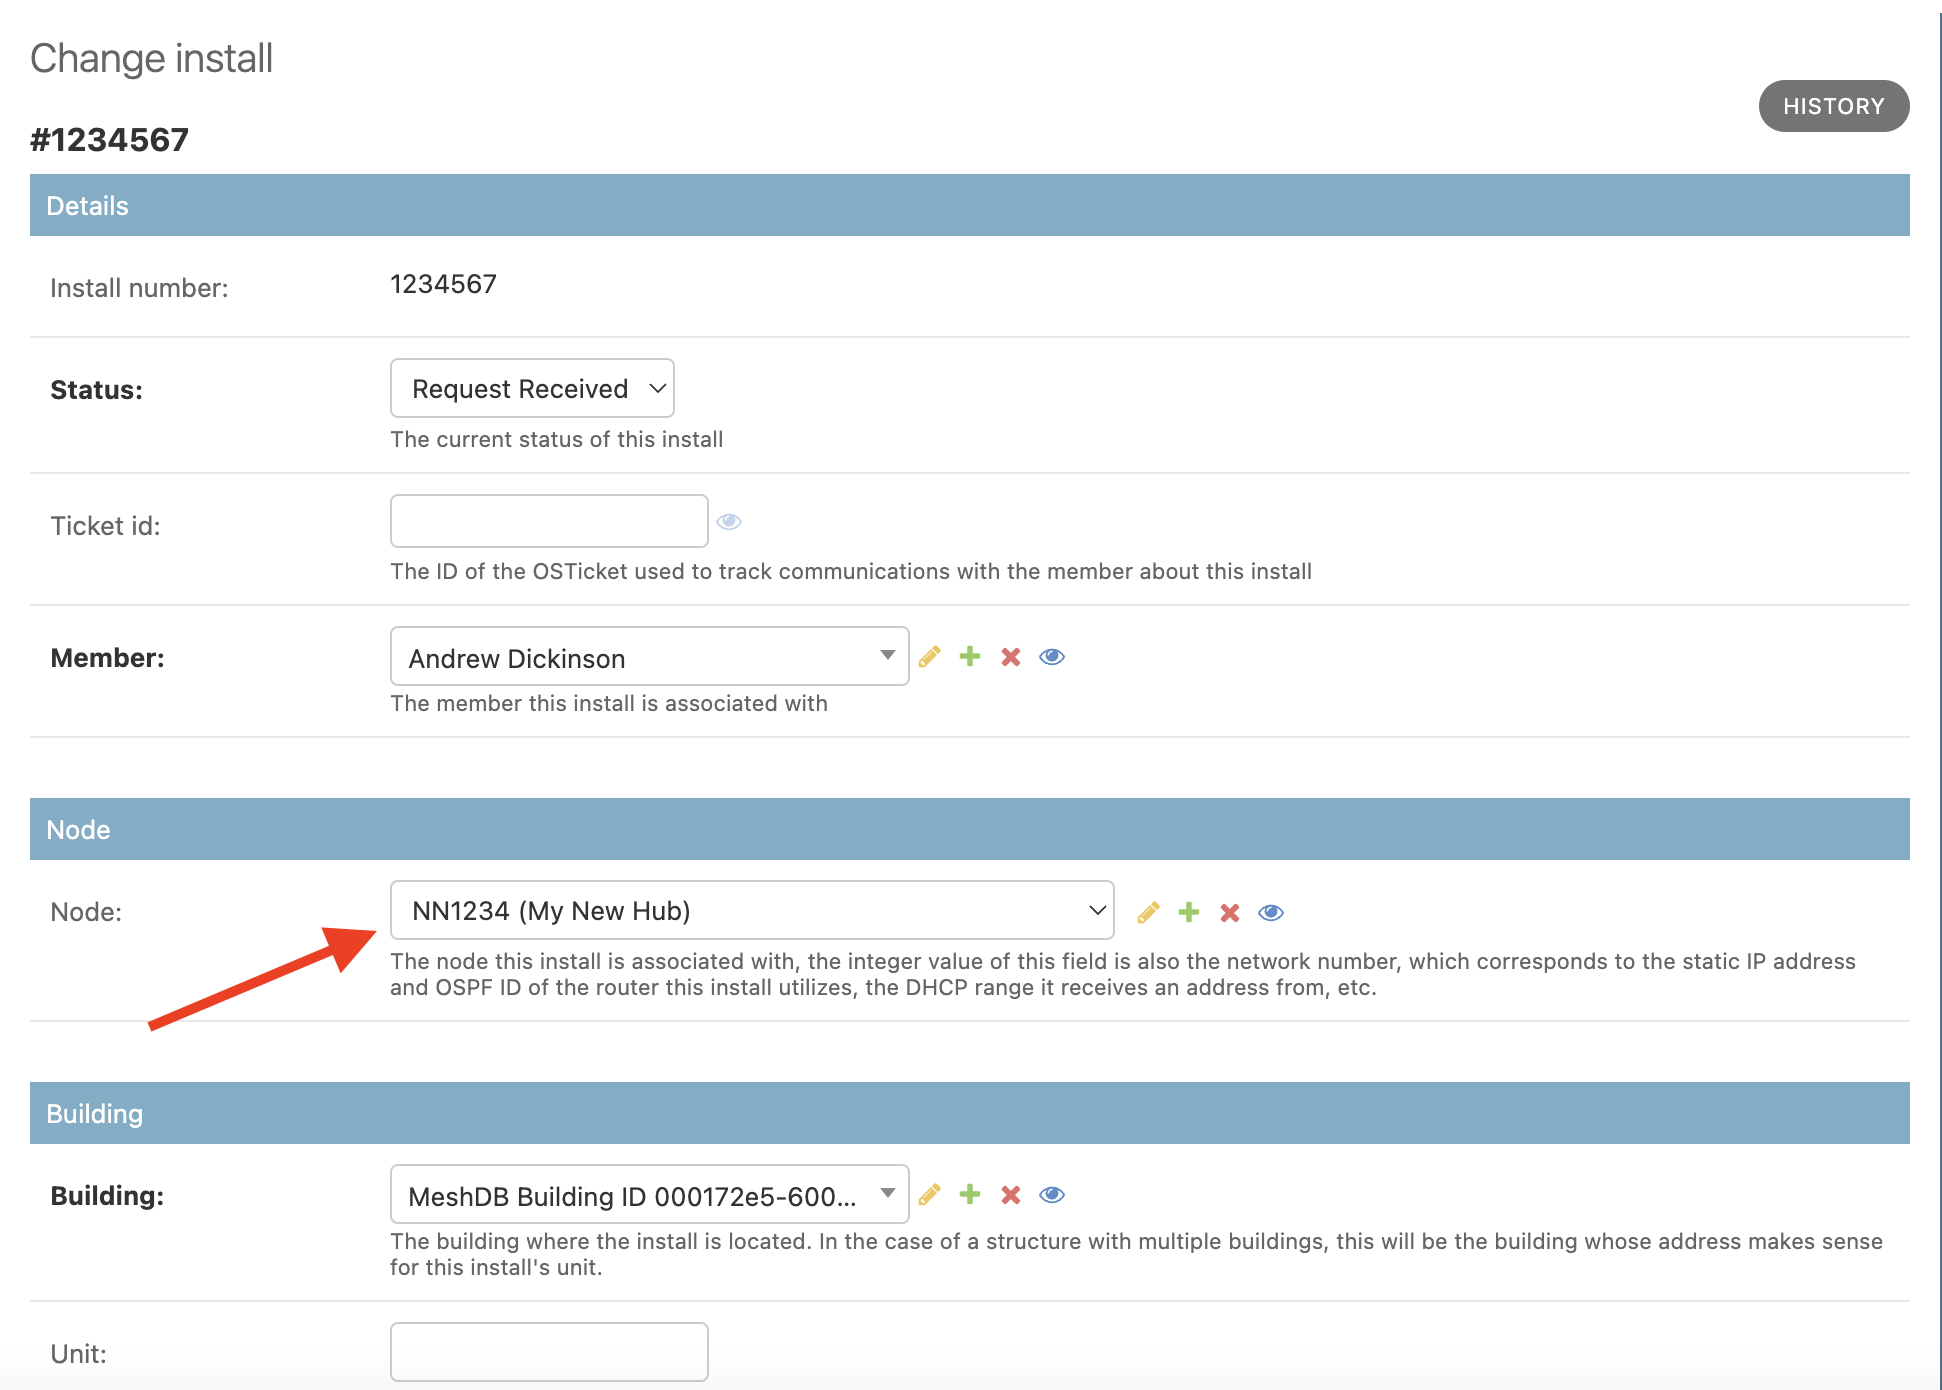
On the install details page, select the node we just created:
Finally, scroll to the bottom and click "Save"