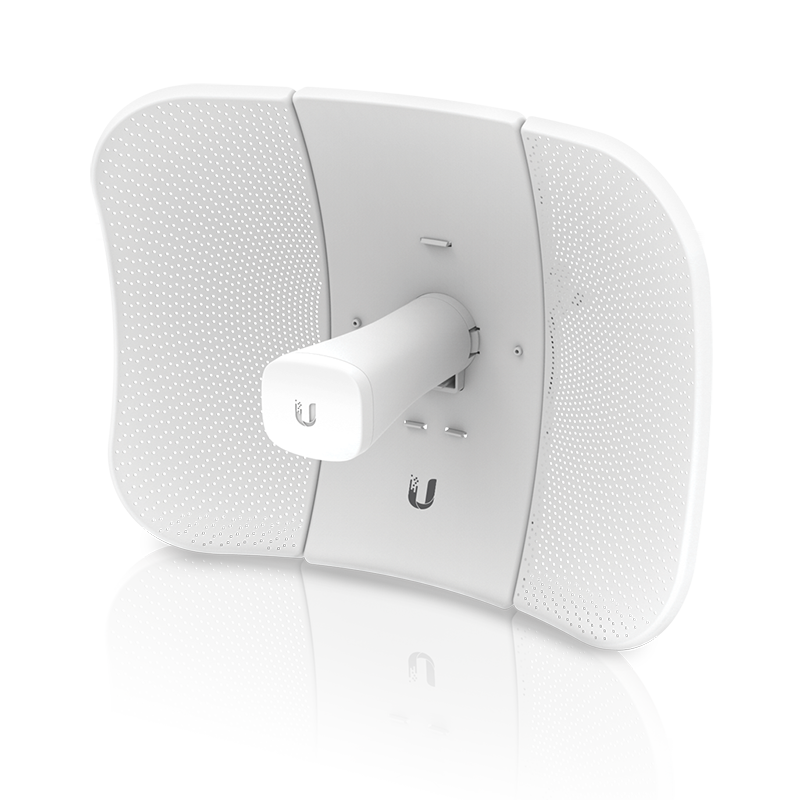
Ubiquiti LiteBeam AC
The LiteBeamAC is a very good, cheap directional router. We use it for most rooftop installs. As with all Ubiquiti gear you need to flash it with the latest firmware first. Often they ship with old beta firmware, and the latest firmware usually gets you faster speeds. Scroll down for configuration instructions.
The AC in the name is not 802.11ac, it is Ubiquiti's own protocol. These devices can only connect to other Ubiquiti "AC" devices.
Device specs are available at store.ubnt.com.
There are two versions- gen1 and gen2. By default they are on two different sets of channels which causes much confusion. The gen1 cannot use the DFS channels unless you unlock it with a code on the System tab. Once you unlock a gen1 it has the same channels as the gen2. We have the unlock code for "NYCMesh". Ask us if you need to connect a gen1 to one of our hubs or supernodes.
Gen2 comes with a more sturdy mount (though less range) and also a management 2.4Ghz radio. The new mount has no movement clockwise so the only way to get the level bubble in the middle is with a straight mount! The management radio is very handy as you don't need to know the IP of the device. The management radio is on a timer so it will go off after about 5 minutes.
LiteBeams are very directional so use the built-in alignment tool to get the strongest signal. We like to get better than -65db. Very close to the supernodes you can get -45db.
The default IP over ethernet is https://192.168.1.20/
If you connect to the management radio the IP is https://192.168.172.1/
Default login:
- name:ubnt
- pwd:ubnt
Configuration Instructions:
Client for Supernodes and hubs with sectors:
First, download the WA firmware in case your LiteBeam is running an outdated version. We currently recommend 8.7.11 for new installs in our network. Do not use 8.7.4 or 8.7.5 as there are bugs that break connectivity after several days.
Second, download the config file for either a standard LiteBeam or LiteBeam LR. You will need your network number which is obtained by entering your Install Number below (you should have received this your email after completing the join form). If error: no address for **** is displayed, please reach out to us on Slack at #install or via email to register your installation. If Sorry, unable to open the file at this time is displayed, try using Incognito Mode or Private Browsing.
Plug in LiteBeam to PoE and connect via management wifi- SSID- "LBE-5AC-Gen2:...." or "NBE..." (booting turns on wifi for 15 minutes)
Go to https://192.168.172.1 in your browser if your device does not automatically redirect you. You may be met with a warning due to a self-signed security certificate, which you can bypass.
At the "Please Set Up Your Device" prompt, select United States under Country and English under language. Select the Terms of Use checkbox and click Upload Backup Configuration. Chose the .cfg file you downloaded from Configgen.
You will see a prompt on the top-right corner of the screen saying Configuration backup file uploaded. Select Apply and wait a minute for the page to reload. Sometimes you will have to refresh the page to get back into the interface.
The username/password will be changed. Please mention your network number and that you’re looking for the new credentials on Slack in #diy-install-support, and they will be sent to you. Please do not share them publicly!
To pair with the supernode or hub, go to Settings>Wireless and click the SSID "SELECT..." button. This will do a scan. Click the button next to the best AirMac AC signal. (-80 is bad, -50 is good, -62 is typical) Click "SELECT" and then "SAVE CHANGES" (twice if necessary)
Troubleshooting: If you are unable to log into the LiteBeam, reset it to factory defaults- press and hold the Reset button for more than 10 seconds while the LiteBeam is already powered on.
What the config file does: The config file sets DHCP for the IP address, WPA password: nycmeshnet, adds the building number to the device name, adds the UNMS key for monitoring and sets the SNMP location and contact to "nycmesh".
Point to Point (PtP) Link Configuration:
Coming Soon!
How to save a LiteBeam via SSH:
These instructions were adapted from a Ubiquiti Community post.
Sometimes due to a bad configuration change or issue with the connected sector, the LiteBeam signal will be too low to log into the web interface. This can be a big issue especially if the users at the node are unable to locally revert the change. Luckily, SSH can be used to reconfigure the LiteBeam to change any settings to restore proper connectivity to the node, even over a poor connection.
1. Connect and log into the LiteBeam
Using your favorite SSH software, log into the LiteBeam using the configured credentials, which will be the same as those used for the web interface. You will then be presented with a standard Linux shell.
2. Prepare for the change
Since this shell does not have any nice text editors like nano, we will use the sed command to replace text in the config file. In this example, we will be changing the SSID nycmesh-sn1-ev to nycmesh-sn1-northeast and saving the changes. Make sure that the LiteBeam will be able to connect to the new radio! (We will cover this part in the following section.)
This command confirms that the current SSID is what we expect (current SSID goes after the grep):
# cat /tmp/system.cfg | grep nycmesh-sn1-ev
wireless.1.ssid=nycmesh-sn1-ev
If the command does not return anything, that means that the current SSID does not match what you provided after grep. Run this line removing everything after the pipe | to review the config file before proceeding.
3. Edit and save the file
Now we will edit the file by finding and replacing the old SSID with this command (old and new SSIDs go before and after the middle slash / respectively):
sed -i 's/nycmesh-sn1-ev/nycmesh-sn1-northeast/' /tmp/system.cfg
Confirm that you made the change by running this command (new SSID goes after the grep):
# cat /tmp/system.cfg | grep nycmesh-sn1-northeast
wireless.1.ssid=nycmesh-sn1-northeast
Finally, run these two commands to commit the change and reboot the device:
save
reboot
Wait 2-3 minutes for the device to reboot and re-scan for the new radio and you should be good to go.
How to scan for radios:
If you are positive that the LiteBeam can connect to another radio's SSID, you do not need to perform a scan (known in the web interface as a Site Survey). However, it is a good idea to confirm that the signal of the other radio is strong enough to connect to before potentially losing the device.
To perform the scan, follow Step 1 from the previous section to connect to the LiteBeam. Then, run the following command to start the scan:
# iwlist ath0 scan
ath0      Scan in progress :
          Cell 01 - Address: 04:18:D6:4C:BB:07
                    ESSID:"ubnt-3P7-N"
                    Mode:Master
                    Frequency:5.165 GHz (Channel 33)
                    Quality=26/94  Signal level=-70 dBm  Noise level=-90 dBm
                    Encryption key:off
                    Bit Rates:6 Mb/s; 9 Mb/s; 12 Mb/s; 18 Mb/s; 24 Mb/s
                              36 Mb/s; 48 Mb/s; 54 Mb/s
                    Extra:bcn_int=100
                    Extra:wme_ie=dd180050f2020101810003a4000027a4000042435e0062322f00
                    Extra:ath_ie=dd0900037f01010000ff7f
                    Extra:ieee_mode=802.11n
                    Extra:center1=5165 Mhz
                    Extra:chanbw=20 Mhz
          Cell 02 - Address: E0:63:DA:D4:41:6B
                    ESSID:"nycmesh-sn1-northeast"
                    Mode:Master
                    Frequency:5.205 GHz (Channel 41)
                    Quality=41/94  Signal level=-55 dBm  Noise level=-90 dBm
                    Encryption key:on
                    Bit Rates:6 Mb/s; 9 Mb/s; 12 Mb/s; 18 Mb/s; 24 Mb/s
                              36 Mb/s; 48 Mb/s; 54 Mb/s
                    Extra:bcn_int=100
                    Extra:hostname="nycmesh-sn1-northeast"
                    IE: IEEE 802.11i/WPA2 Version 1
                        Group Cipher : CCMP
                        Pairwise Ciphers (1) : CCMP
                        Authentication Suites (1) : PSK
                    Extra:wme_ie=dd180050f2020101000003a4000027a4000042435e0062322f00
                    Extra:ath_ie=dd0900037f01010000ff7f
                    Extra:airmax_ie=enabled
                    Extra:airmax_mode=ptmp
                    Extra:ieee_mode=802.11ac
                    Extra:center1=5215 Mhz
                    Extra:chanbw=40 Mhz

...
This scan takes about a minute to complete. You may notice the terminal freeze during this time; the LiteBeam switches to another wireless mode while scanning which can sometimes disrupt the connection. As you can see in this example, our target radio with SSID nycmesh-sn1-northeast has a signal level of -55dB which should be more than adequate for us to connect.
No Comments