How to bulk create installs for large buildings
These instructions detail how to provision many Install requests at once. Usually this is done at large buildings where the mesh serves many apartments. Often we install the equipment all at once during a renovation or construction without an explicit request from the resident of the apartment. In this scenario we need to create install numbers in our systems without asking each resident to submit the join form.
Create/Locate the Supporting Objects
Since MeshDB uses a relational model to store data, multiple objects need to be created to represent the equivalent of a single row in the "New Node Form" spreadsheet. Before we can create Install objects, we must first create Member and Building objects, and assign a network number.
The easiest way to do this is to submit the join form once on behalf of the building (if not already done previously). Once created, open this first install object in MeshDB:
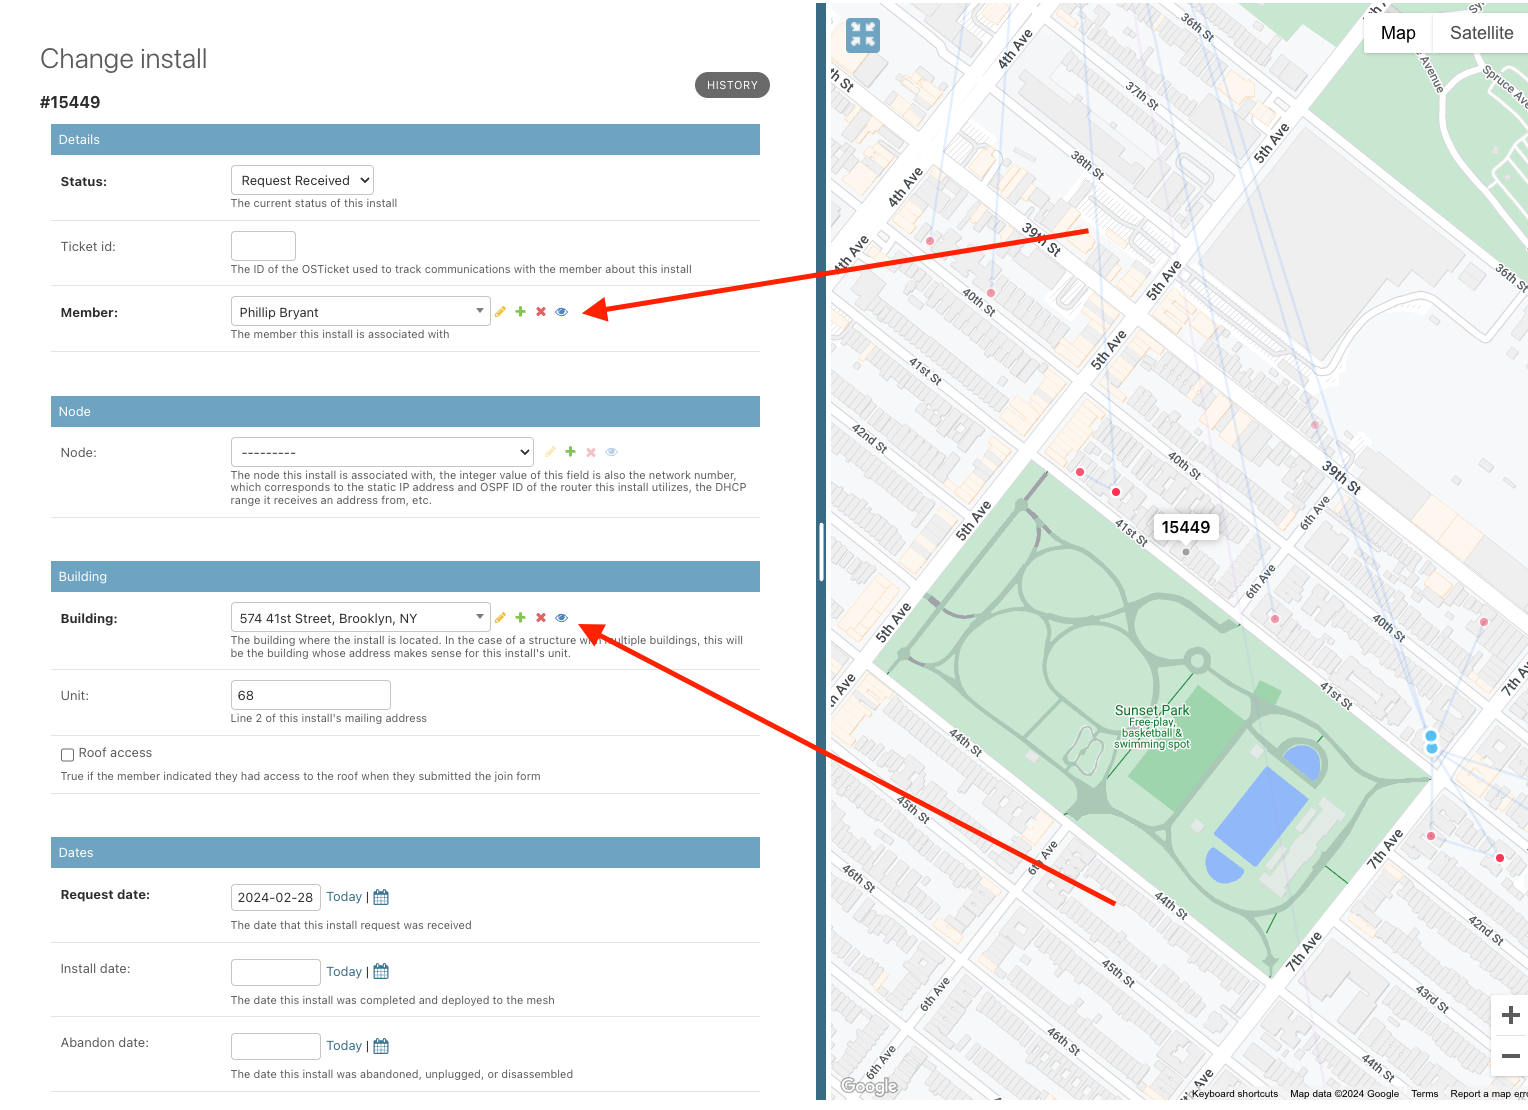
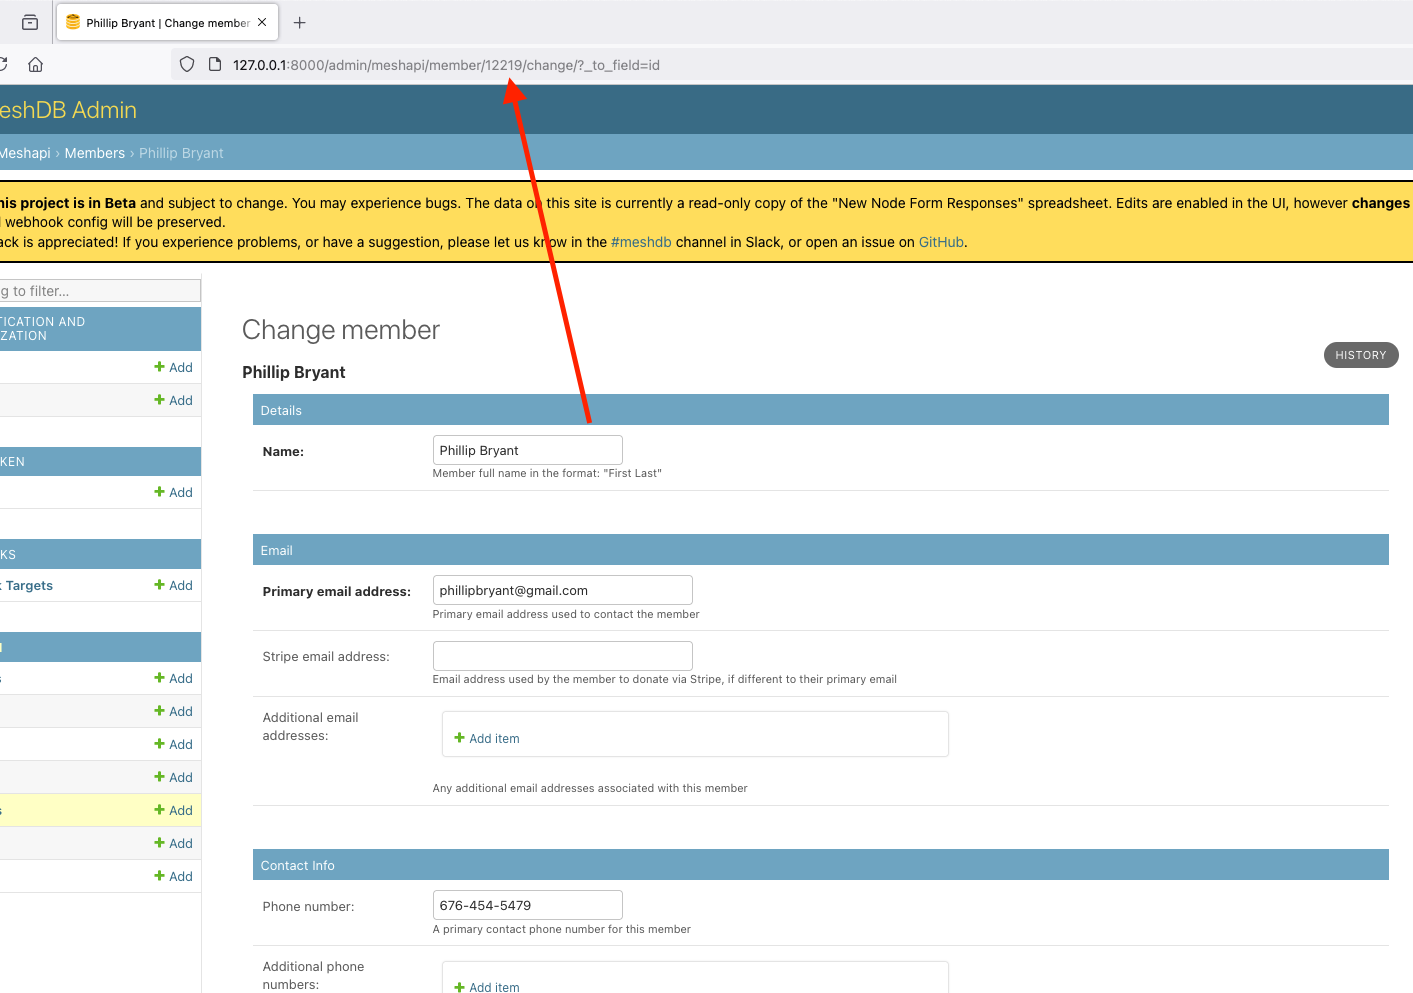
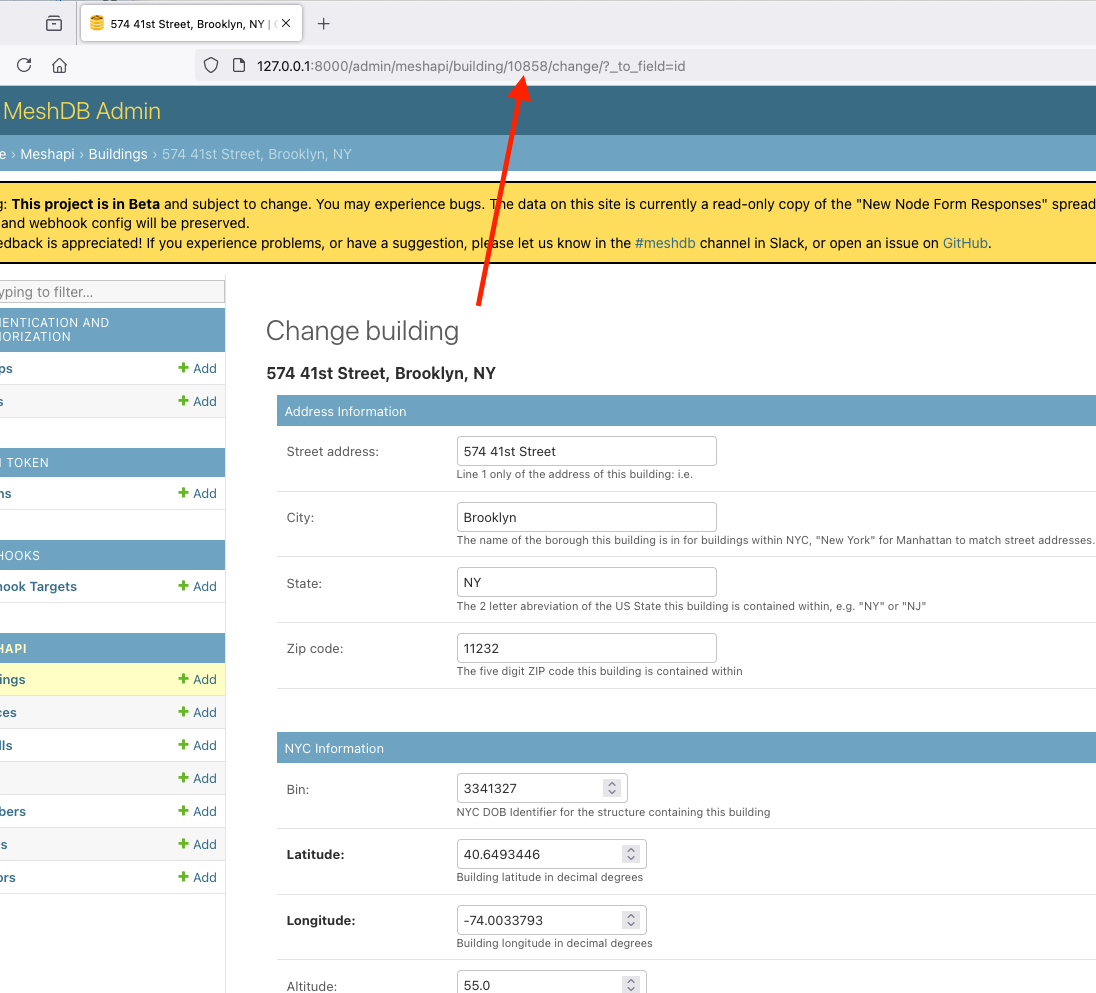
Use the eye icon next to the building and member entries to open the linked objects. On each object, note the object ID from the URL. For example, in the screenshots below, the meshdb member ID is 12219, and the meshdb building ID is 10858
At this point, you should also assign this location a network number using the NN assignment tool. Use this "first" install to assign the NN, and make a note of it as well.
Build the import CSV
In order to create the install requests in bulk, we need to place the necessary information in a tabular format. Several formats are supported, but for these instructions we will use CSV as it is the simplest to work with using standard spreadsheet applications such as Excel or Google Sheets. To start, open the following CSV template in your favorite spreadsheet application:
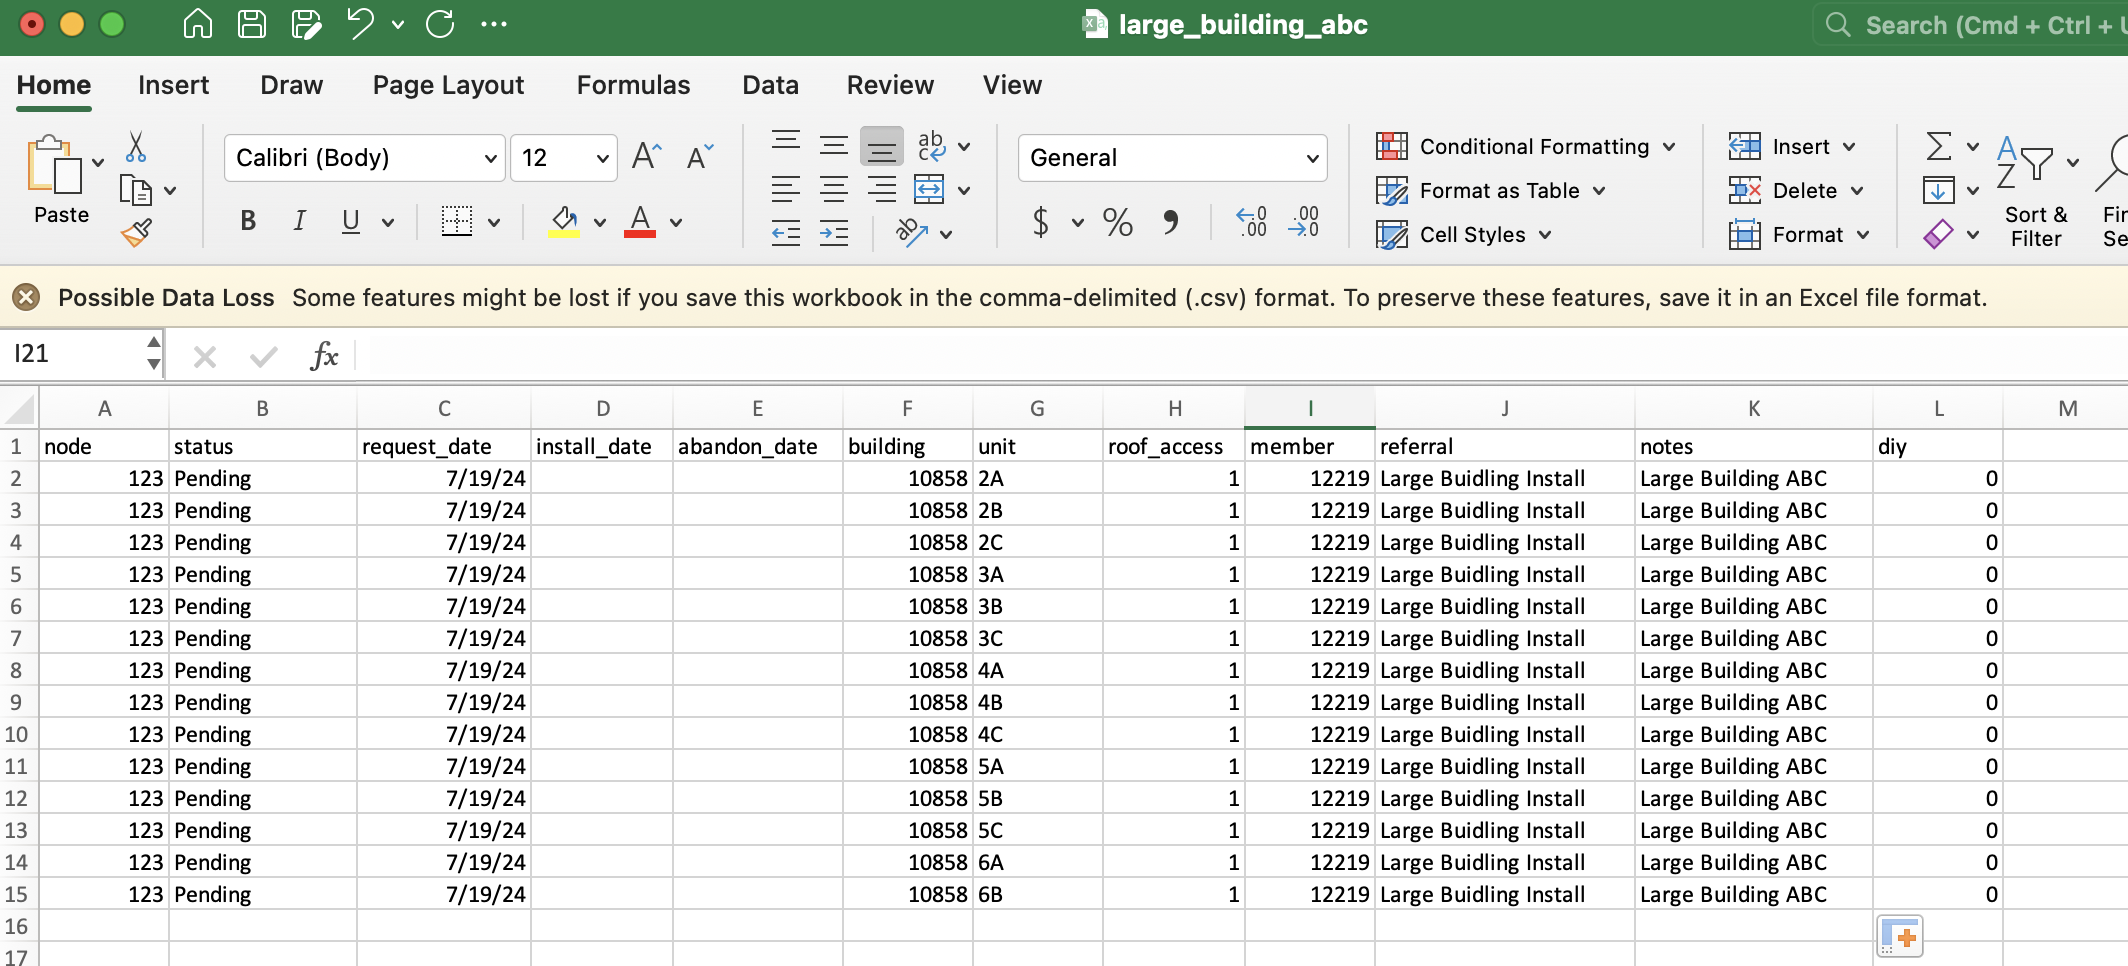
node,status,request_date,install_date,abandon_date,building,unit,roof_access,member,referral,notes,diy
123,Pending,07/19/2024,,,10858,2A,1,12219,Large Buidling Install,Building Name,0
123,Pending,07/19/2024,,,10858,2B,1,12219,Large Buidling Install,Building Name,0
123,Pending,07/19/2024,,,10858,2C,1,12219,Large Buidling Install,Building Name,0
123,Pending,07/19/2024,,,10858,3A,1,12219,Large Buidling Install,Building Name,0
123,Pending,07/19/2024,,,10858,3B,1,12219,Large Buidling Install,Building Name,0
123,Pending,07/19/2024,,,10858,3C,1,12219,Large Buidling Install,Building Name,0
123,Pending,07/19/2024,,,10858,4A,1,12219,Large Buidling Install,Building Name,0
123,Pending,07/19/2024,,,10858,4B,1,12219,Large Buidling Install,Building Name,0
123,Pending,07/19/2024,,,10858,4C,1,12219,Large Buidling Install,Building Name,0
123,Pending,07/19/2024,,,10858,5A,1,12219,Large Buidling Install,Building Name,0
123,Pending,07/19/2024,,,10858,5B,1,12219,Large Buidling Install,Building Name,0
123,Pending,07/19/2024,,,10858,5C,1,12219,Large Buidling Install,Building Name,0
123,Pending,07/19/2024,,,10858,6A,1,12219,Large Buidling Install,Building Name,0
123,Pending,07/19/2024,,,10858,6B,1,12219,Large Buidling Install,Building Name,0
Edit the following columns based on the information collected above:
node- set all rows to the NN assigned for this locationstatus- likelyPendingfor all rows, though if some equipment has already been installed,ActiveorInactivemay be more appropriate. See MeshDB Status Values for more information about each value and when it is most appropriaterequest_date- set all rows to the current date in the formatMM/DD/YYYYinstall_date- leave blank or set to the date of the equipment installation as appropriateabandon_date- leave blankbuilding- set all rows the MeshDB numerical ID of the building as identified aboveunit- enter the unit number for each install request as provided/defined by the building ownerroof_access- enter1(true) or0(false) to indicate if access to the roof is available at this sitemember- set all rows the MeshDB numerical ID of the member object created for the "original install" as identified above- This is not the only option, it is possible to create different member objects for each install row if contact information is available, see the section titled "Bulk Add Members" below for more info
referral- optional, a but good place to indicate this install was created for a large buildingnotes- optional, but a good place to indicate the name of the building/node that these installs belong todiy- enter0(false) for all rows to indicate that these installs are conducted by volunteers, not DIYers
The following columns can be optionally added to the spreadsheet, but should not be unless there is a good reason, and you know what you're doing:
install_number- under normal circumstances this should not be specified manually, since these are automatically assigned by meshdb when the installs are importedticket_id- meshdb will automatically create OSTicket entries for each install request as needed. Do not manually create these
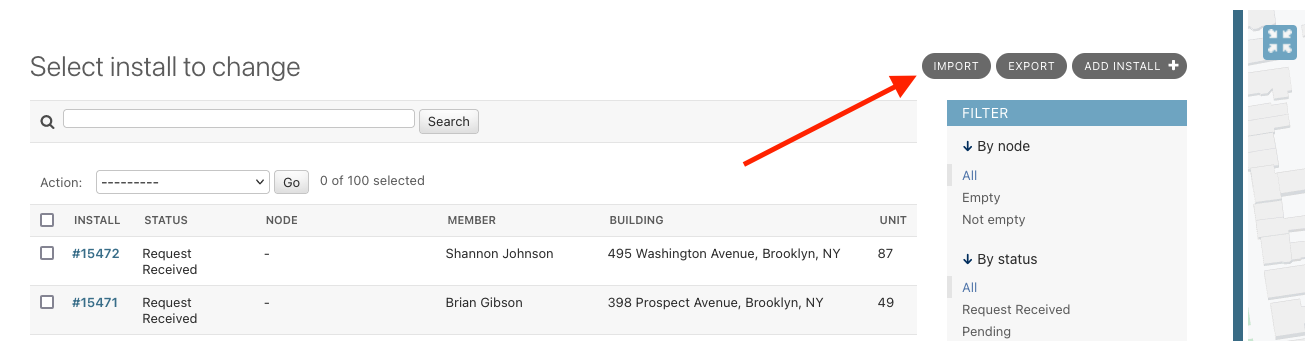
Import your CSV into MeshDB
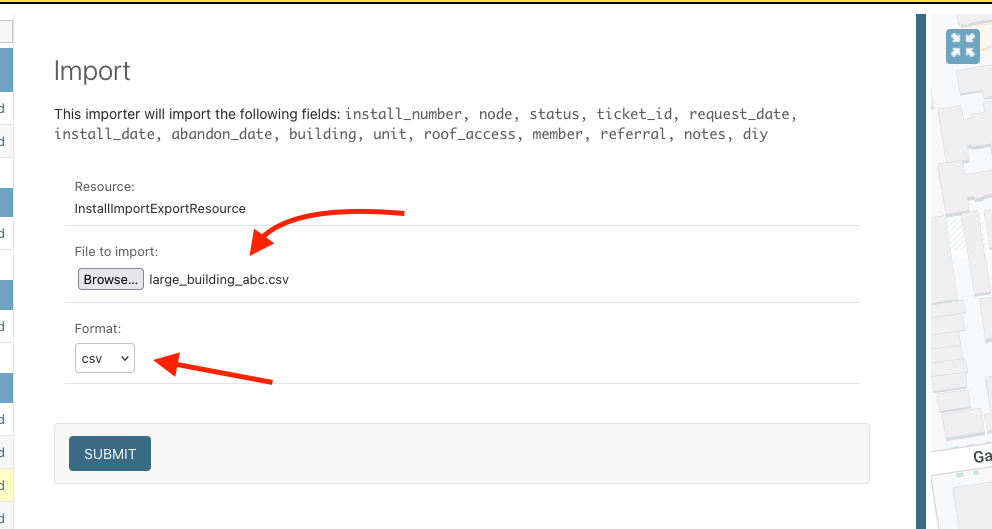
Select your CSV file, and select CSV as the format in the dropdown:
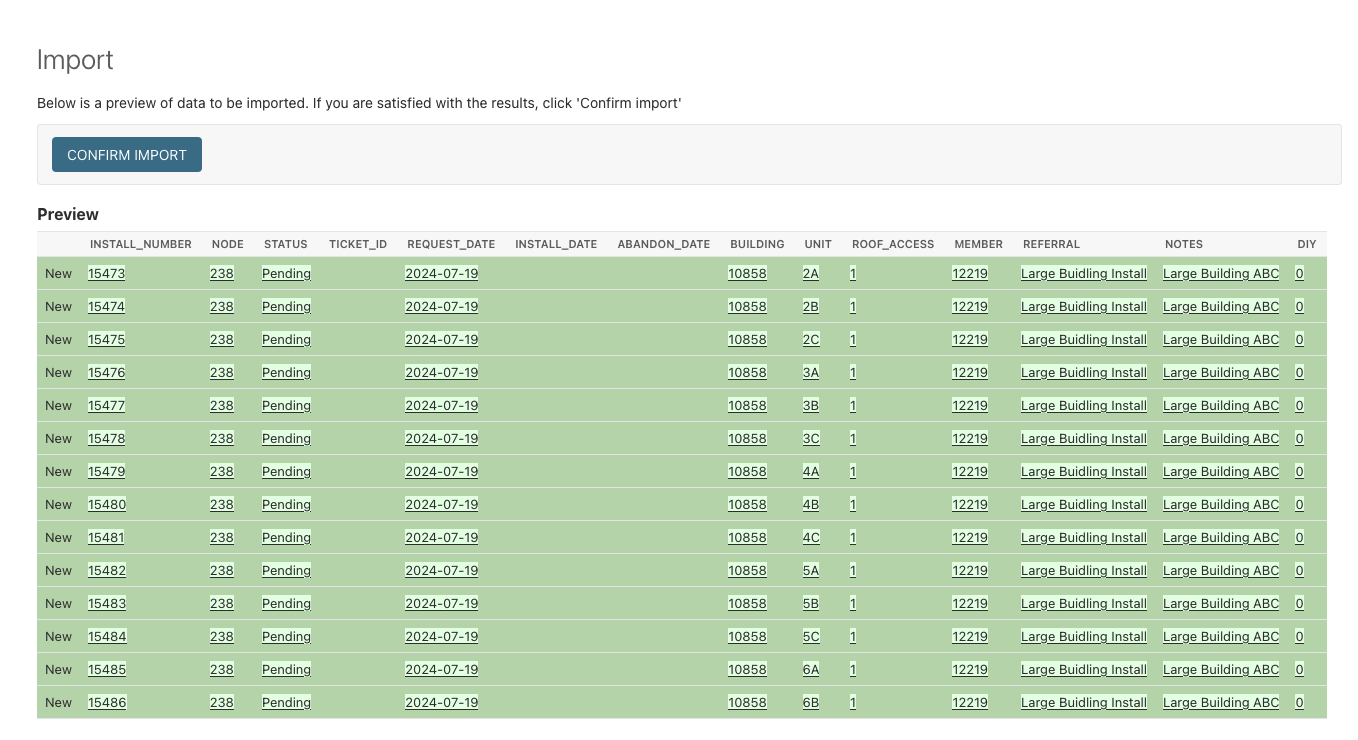
Review the information available on the confirmation screen for correctness, note the generated install numbers if desired and select "confirm import" to create the new installs in the database:
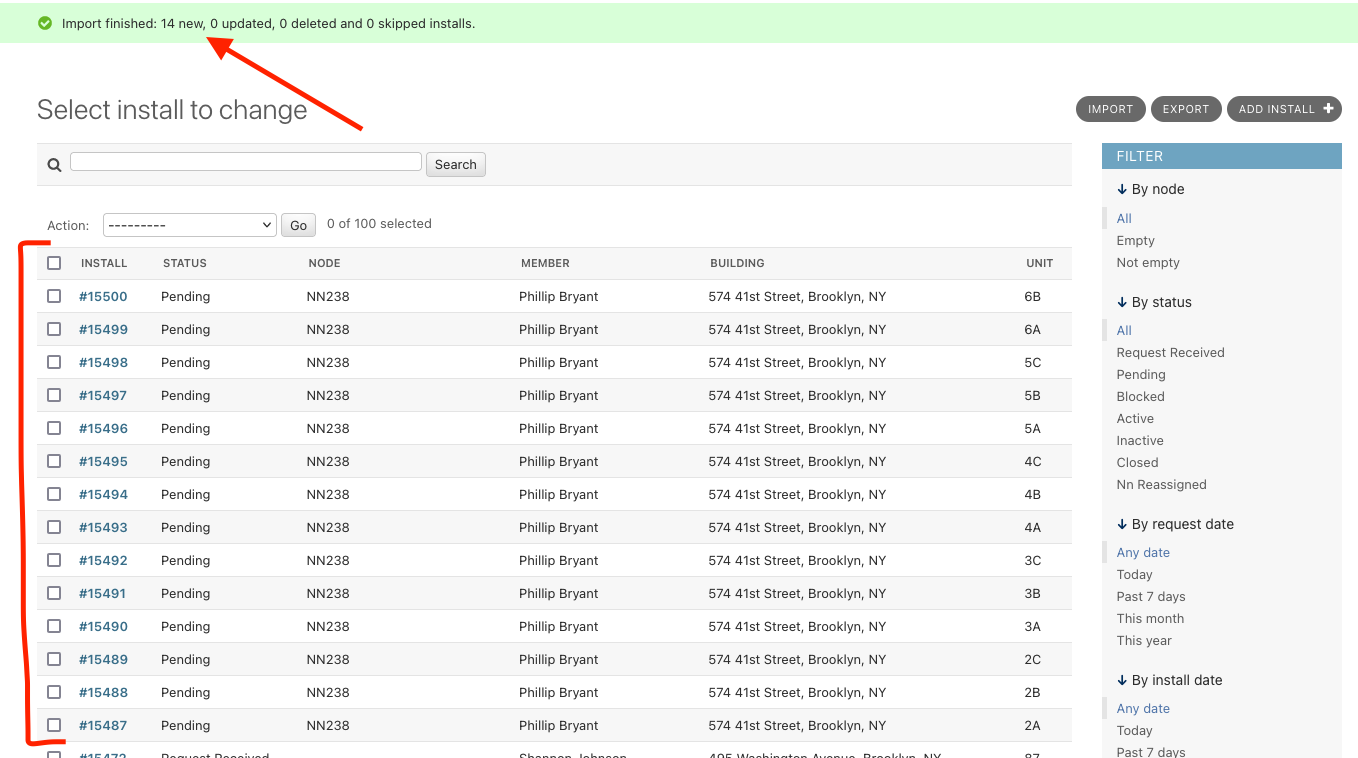
Check to make sure the correct number of installs was created, and observe the newly created install rows in the "all installs" view: